1.How to do a bike maintenance at home?
1.1 Bike full maintenance vs. interim maintenance
Like a car’s full service and interim service (maintenance), a bicycle has a full service and an interim maintenance.
1.1.1 Bike full mainitenance
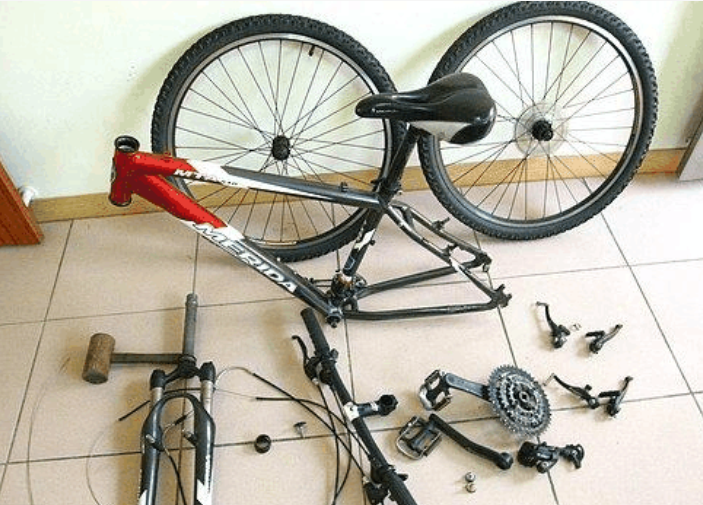
In the process of full bike maintenance, you need to remove all parts of the bike from the bike frame and carefully clean and lubricate the bike. The disassembling of bicycles requires a lot of professional tools, and the whole maintenance process also consumes a lot of energy and time. So for the average enthusiast, SUMLON recommends that you go to a professional bike shop to do a full service. The frequency of full service is about once a year.
1.1.2 Bike interim maintenance
The interim service is much simpler than the full service, mainly including bike washing, tire pressure inspection and lubricating for the transmission mechanism. The interim service does not require you to disassemble any parts or prepare any special tools. If you don’t know how to complete a bike maintenance, SUMLON will show you how to complete an interim service or even a full service.How to implement an interim service at home?
1.1.3 Recommendations
SUMLON recommends that all cyclists complete the interim service independently at home. You should complete an interval service for your bike every 100 km or so. It is also advisable to do an interim service immediately after a rainy day or on a dirt road. Next, SUMLON teaches you how to use the tools you can find to perform an interim service on your bike at home.
In bike maintenance, you need to ensure that the parts with bearings can be kept dry after cleaning. If you cannot guarantee that, do not clean the front hub, real hub, headset and bottom bracket at home. To clean the front hub and real hub, two wheels need to be disassembled from the frame. To clean the headset, you need to remove step and to clean the bottom bracket, you need to remove crankset. These are all things that need to be done in a full maintenance.
1.2 Bike interim maintenance
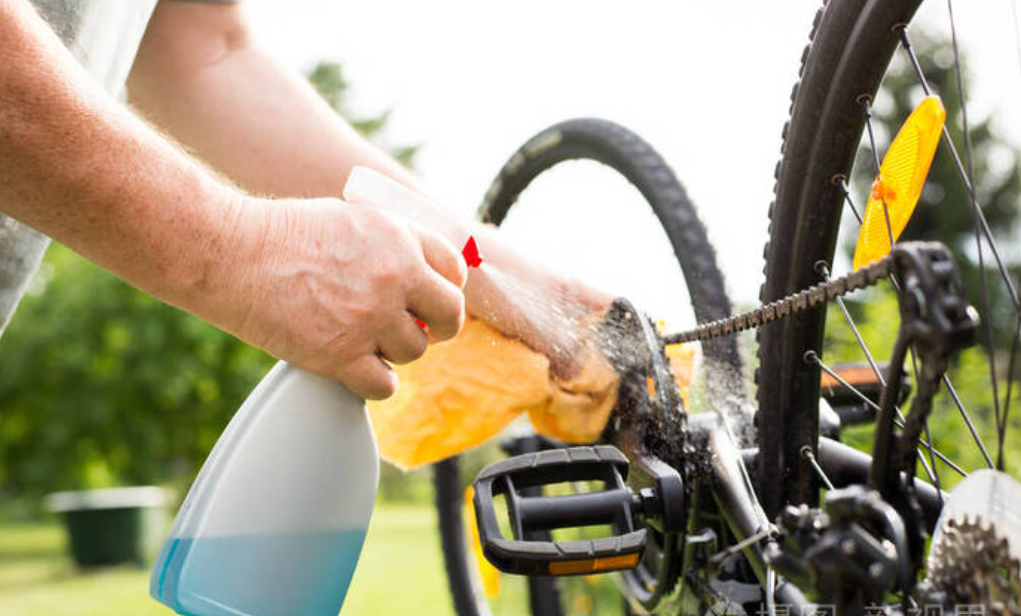
In the interim service process, you only need to do three things: clean the entire bike, check the tire pressure, and clean the chain and flywheel and add lubricating oil without removing the wheel and transmission system.
1) clean the entire bike
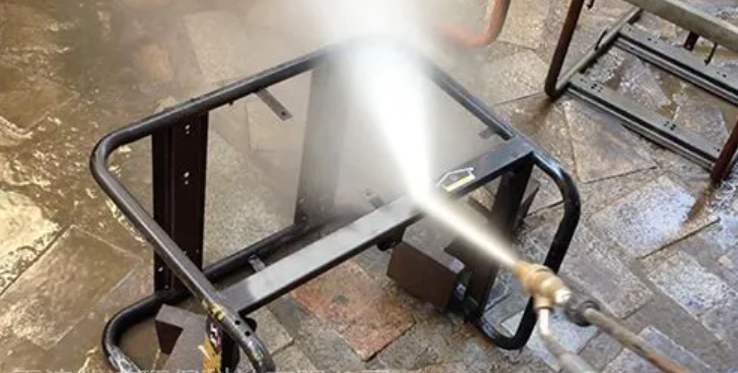
When washing the whole bicycle, the high pressure water gun may spray water into the key parts of the bicycle, causing damage or water ingress. It is best to use a medium pressure water stream or manually clean. If your bike has electronic components, such as batteries or controls on your e-bike, be sure to turn them off before washing to avoid damage. If the bicycle is very dirty, use some mild detergent to help clean, but make sure to wash thoroughly after cleaning, so as not to damage the surface or parts by residues. Avoid direct water spraying of bearings and lubrication components as much as possible to avoid flushing of lubricating oil and damage to parts. Carefully check all parts of the bike after washing to ensure that no water droplets remain. Especially around the brake and transmission components, make sure they are dry.
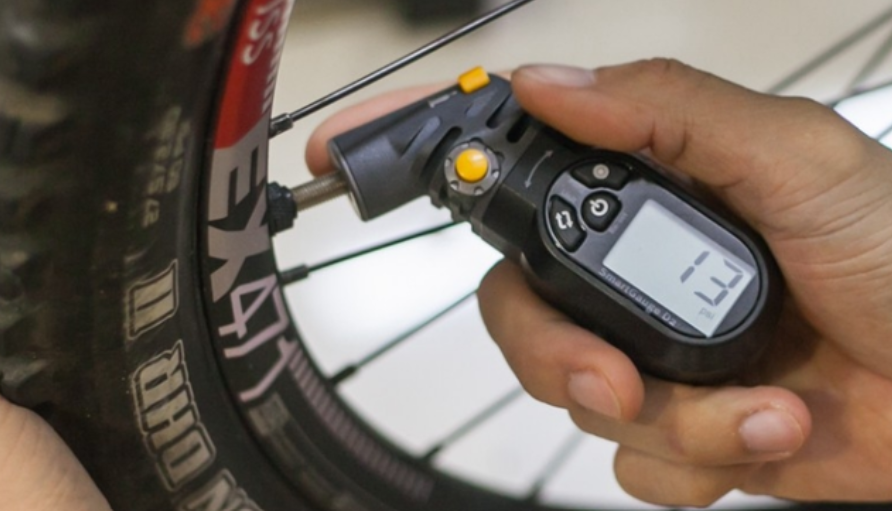
2) check the tire pressure
you need to use a pump with a tire pressure gauge. If you do not know the correct tire pressure, please see: Optimize tire pressure of your road bike
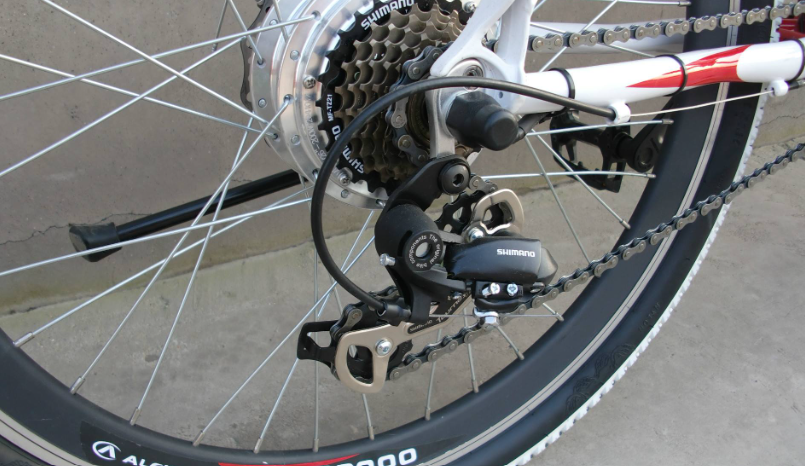
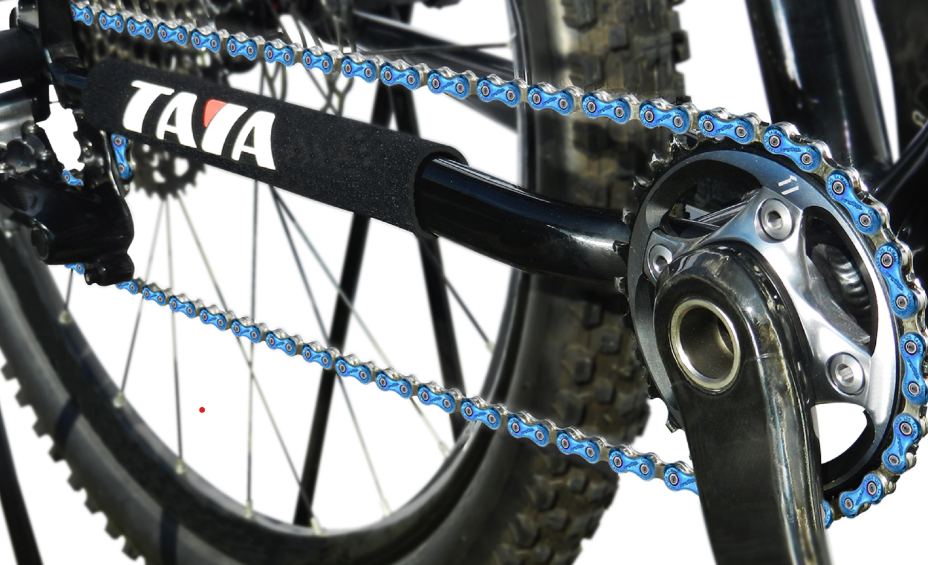
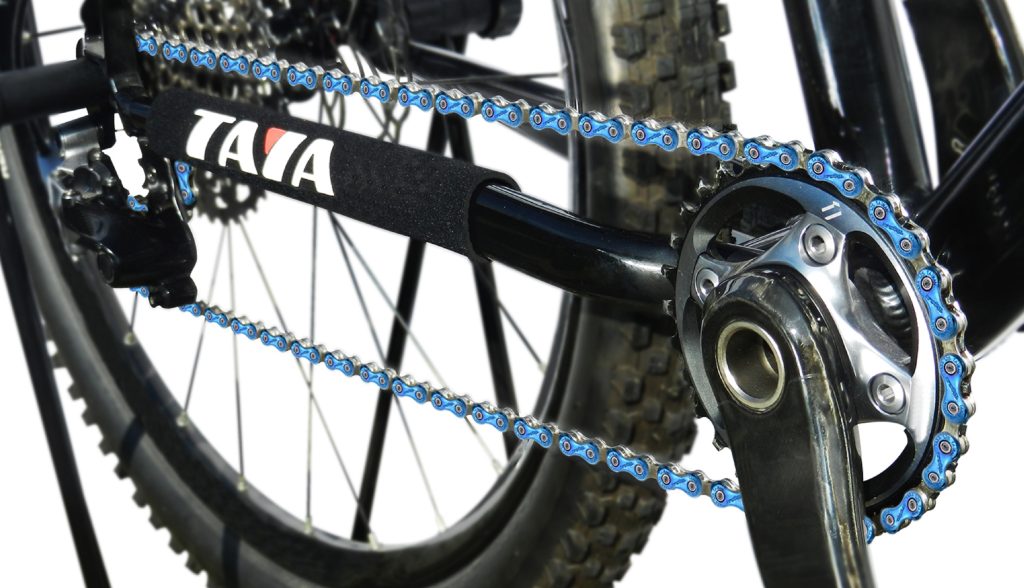
3) clean the chain and flywheel
In one intermediate maintenance, the most difficult operation is to clean and add lubricating oil to the transmission system. You can simply interpret it as chain and flywheel cleaning. In this process you will need a brush, special cleaning agent for chains, dry towels and proper chain lubricant. Follow SUMLON home page. We will soon upload a tutorial on how to select chain lubricants.

I’m sure you can easily find videos on YouTube that show you how to clean chains and flywheels. In general, you need to spray or smear the cleaning agent on the chain and flywheel, and ensure that the cleaning agent covers all parts of the chain and flywheel. Next, you need to use an old toothbrush or special chain cleaner to gently scrub each link of the chain and flywheel, especially the dirty part of the chain.
Be careful not to apply too much force to avoid damaging the chain. Then, wash the chain and flywheel with clean water to clean the cleaner and impurities. Wait 10-15 minutes after the entire process. Apply special lubricant for bicycles to clean and dry chains after ensuring that chains and flywheels are dry. Make sure that the entire chain is lubricated with oil, but avoid using excessive lubricating oil to avoid absorbing too much dust and impurities. If necessary, you can wipe the chain surface with a clean cloth to remove excess lubricating oil.
1.3 How to complete a bike full maintenance at home?
1.3.1 Try not to do a full bike maintenance at home
SUMLON does not recommend a full maintenance cycle at home. Because this process requires almost all parts of the bike to be disassembled, cleaned, and reassembled. This requires specialist knowledge and tool sets. And because this process involves cleaning and replacing bike parts with bearings, bike shops have high-pressure air jets to ensure that no water is left in these parts and in the frame gaps. You can’t guarantee this at home. SUMLON still recommends that you send your bike to the nearby bike shop on an annual basis and have the shop technician help you with this process.
1.3.2 Guideline to a full bike maintenance at home if you insist doing so
If you decide to complete a full maintenance at home. We will give you an overview of this process and simple considerations.
Step 1
The first step is to disassemble the complete vehicle completely. Please use the correct screwdriver here to prevent the screw from being damaged.
Step 2
Clean all bicycle parts, including frame, chain, flywheel, brake and transmission, etc. Take care to avoid direct spray of water into critical components such as bearings. Clean tiny parts such as gear and chain links with clean cloth or brush.
Step 3
You need to check all parts of the bicycle, including tires, brakes, transmission, chains, screws, etc., to ensure that they are in good condition and are not loose or worn.
Step 4
We recommend that you apply special lubricant for bicycles on clean and dry chains to ensure that the lubricant seeps into every link of the chain.

Step 5
Check the brake pad, chain, inner and outer tires, etc. If any wear or damage is found, replace it in time. Finally, reinstall all bicycle parts and adjust the brake system and gear system to ensure they work properly.
This may seem a simple process, but it contains too much operational detail. See another topic published by SUMLON. It tells you what details you should pay attention to in a full maintenance.
2. Checklist during a bike maintenance
SUMLON found that bikers use so many wrong methods and ignore so many important details when servicing and maintaining their bicycles. We would like to show you some important tips for bike maintenance to ensure that your maintenance is correct. We have 13 check points during your bike maintenance, here we go.
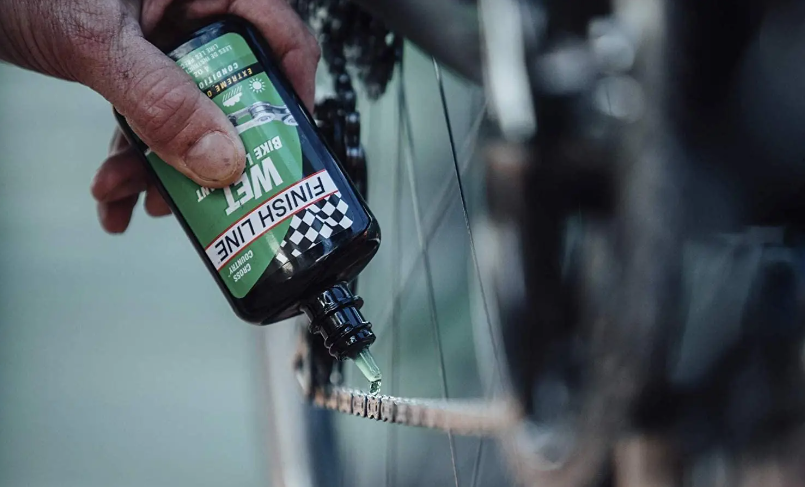
2.1 How much oil should you add to the chain?
During a bike maintenance, you do not need to add extra lubricant to gear sprockets and chain rings. You just need to grease the chains. Some cyclists mistakenly add too much lubricant to the chain or additionally grease the gear sprockets teeth and chain teeth to improve the lubrication of the drive system. This is also incorrect. Too much chain oil will mix with silt and attach on the chain, gear sprockets and chainring.
These lubricants accelerate the wear of gear sprockets and chaining teeth. Too much lubricating oil will attach more dust and turn into more oil stain. Conversely, too little chain oil may damage the bicycle chain. The correct way to add and apply lubricating oil is to add lubricating oil to each joint of the chain. After the lubricating oil fully penetrates into each joint, wipe off the excessive lubricating oil with cotton cloth. You only need to make sure that the chain surface has a protective oil film.
2.2 Any uncleaned matter left between the tube and outer tire?
Careful cleaning the matters between the inner tube and outer tires of bicycles during bike maintenance is an important step to ensure riding safety, which can effectively reduce the risk of secondary tire burst. These may include sharp stones, glass fragments, metal fragments, or small pieces of material puncturing the outer tube. Once they penetrate through the outer tube and insert the inner tube, they will cause a burst. You can prevented these maters from further damaging the tire by periodically checking the bicycle tires, particularly by carefully cleaning the inter layer between the inner tube and outer tires.
The foreign matter cleaning process is necessary to ensure that all potential hazards are clean. In addition, timely replacement of aging or seriously worn tires is one of the important measures to reduce the risk of tire burst. Keeping bicycle tyres clean and in good condition will make your ride safer and more enjoyable. Remember that prevention is better than treatment, and periodic inspection and maintenance are the key to ensuring safe cycling.

2.3 How do I fit the screws correctly during bike maintenance?
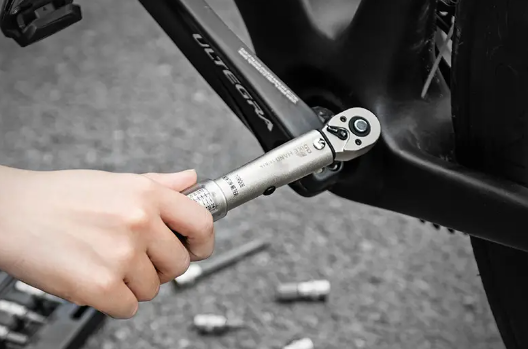
Excessive tightening of screws on bicycles is a commonly seen but easily neglected problem. This behavior may lead to screw break, frame damage and even safety hazards. Dealing with this kind of accident is not only time expensive but also economical. Especially when using tools with long arms, it is difficult to accurately judge the tightening force, which increases the possibility of error. Carbon fibre fittings are particularly vulnerable and, if damaged, can be costly to repair.
To avoid these problems, it is essential to tighten with a torque wrench according to the torque indication on the fitting. Torque wrenches ensure standard operation and avoid excessive force damage. In addition, be careful when tightening the screws. Excessive force will not only damage the screw mouth, but also cause the screw to break or the handle to deform. If you regularly debug your bike, it is a wise investment to purchase a torque wrench that is not only affordable but also safe to ride. Maintaining bicycles is more than just keeping them in good condition, but also for your own safety and riding experience.
2.4 Choose the highest tire pressure in bike maintenance?
For novice road cyclists, it is common practice to adjust the tire pressure to the maximum tire pressure marked on the outer tire label, and some even prefer to apply a higher tire pressure, thinking this will reduce rolling resistance. However, a high tyre pressure actually only increases the sense of jolt and consumes more energy unless the road surface is flat like a steel plate. SUMLON recommends that you control the tire pressure within the range of 90-100 PSI. A heavier rider can increase the tire pressure to 110 PSI appropriately. For lighter-weight cyclists, you can reduce the tyre pressure appropriately to improve ride comfort and efficiency. Excessively high tyre pressures increase the sense of jolt and cause more loss of strength, which is one of the reasons why more cyclists are selecting tyres 25c or wider as the road is rarely perfectly flat.

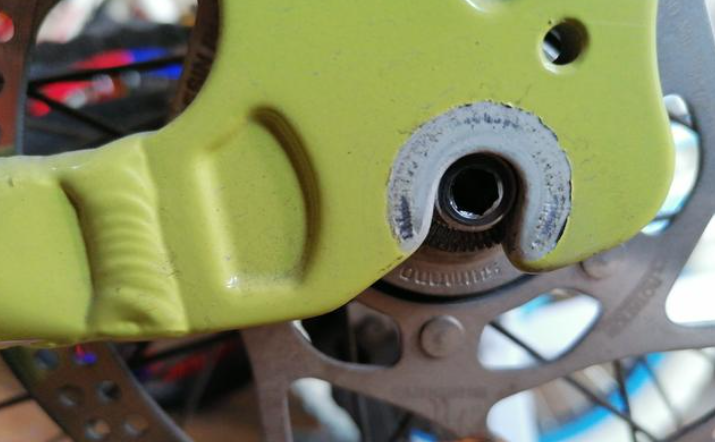
2.5 Have you correctly set the limit screws on the derailleur?
Proper adjustment of the stop screws of front and rear derailleur essential in bike maintenance. Their functions are to prevent the chain from falling off to the inside or outside of the frame and prevent the chain from falling between the wheel set and the flywheel. In particular, the limit screw on real derailleur ensures that the chain does not fall between the wheel set and the flywheel, which will not only damage the transmission system, but also lead to serious accidents. Some may neglect the role of these screws, but in reality they avoid potential hazards and repair costs. Before adjusting these screws, it is better to know their functions first. If you are unfamiliar with them, it is better to consult professionals or go to the nearby car shop for inspection. You should check and adjust these screws regularly to make sure they are in the correct position.
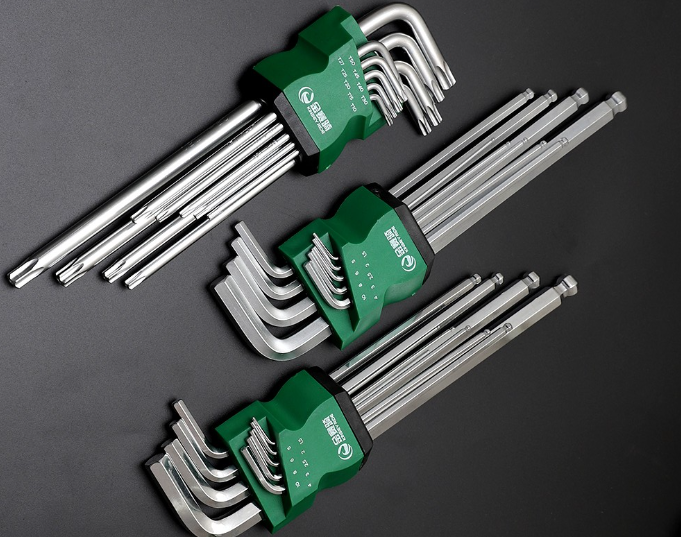
2.6 Are you still using a low-quality Allen screwdriver?
Especially for those who prefer to retrofit and repair bicycles themselves, it is essential to replace a robust and standard set of hex tools. Poor Allen wrenches tend to be difficult to sustain, easily damaged, and sometimes broken, causing more trouble with maintenance. A better quality tool usually has a higher manufacturing accuracy that ensures a perfect match between the socket head screw and the wrench. This means that you can tighten or remove the screws more easily without having to worry about tools slipping or damaging the screw head.
High-quality tools are usually made of durable materials, such as high quality steel or alloys. This makes the tool more durable in a bike maintenance, able to withstand prolonged use and repetitive stresses, reducing the need for damage and replacement. Use of better quality tool sets can reduce the risk of accidents. For example, using a bad wrench may break or slip at critical times, causing loss of control or injury.
2.7 Is Frame and fork tightly joined in your bike maintenance?
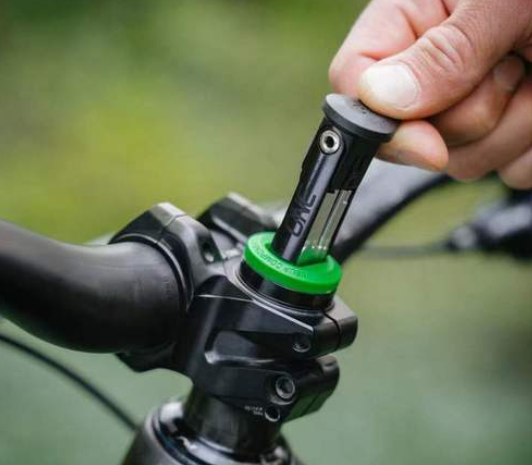
You can easily see if the headset is loose when braking. Once you have completed a full maintenance, you need to test ride your bike and determine if you have properly installed the headset. If you ignore this and your headset does loosen, your head tube has a very high probability of deformation and breakage. Prevention of this is actually very simple. All you have to do is stand next to your bike, pinch the front brakes and shake your bike to check for ore at the head tube, check that have you connect the forks and frame tightly. If so, just unscrew your step and tighten your headset and check again for play. If not, reinstall your handle. Remember to use the torque wrench during the whole process, otherwise it will brake the head tube.
2.8 Has your seat post been stuck in the seat tube too?
Whether it is carbon fiber, aluminum alloy or steel seat tube, long-time failure to wipe and clean may cause the seat post to be stuck in the seat tube, causing inconvenience and loss to you. Dust, sand and dirt may accumulate on the inner wall of the seat tube after long-time use, causing the seat rod to get stuck in the seat tube. This will make it difficult to adjust the seat height and replace the seat rod, and may even cause the seat rod unable to lift normally after your bicycle maintenance. Regularly pull out the seat bar for cleaning can avoid this situation and ensure the smooth use of the seat bar.
Before cleaning, be sure to make sure you are seated so that you can recover to a comfortable riding position after re-installation. For carbon fiber seat tube, more attention shall be paid to adding some anti-sliding agent to prevent the seat tube from sliding down. Seizure of the seat bar in the seat tube may lead to accidents, such as sudden sliding or shaking, increasing the risk of cycling. Regular cleaning of the inside of the seat tube can prevent this and improve the riding safety.
2.9 Are you still using a high-pressure water pump?
Bicycle structures contain many bearings, including headset, bottom brackets, front hub, real hub and pedals. You need Proper lubrication oil for normal operation of the bearing. When the pressure of the water flow is too large, the water will enter the bearing of the frame after a bike maintenance. The water flow from the high pressure water gun may wash off the lubricating oil on the bicycle, which will increase the friction between parts and lead to rust or damage of parts. In addition, high pressure water flow is very easy to enter electronic components, causing short circuit and damage to electronic components. You don’t want this to happen.
2.10 Use air pump to deal with the residual water in the gaps.
If you would like to be more like a pro of bike maintenance, buy an air pump. In addition to conventional wiping and lubricating oil supplement after washing, it is more critical to use a compressed air pump to remove the water in the gap between parts. This can effectively prevent rust and corrosion of parts. By removing water droplets from bearings, bowl sets, flower drums, flywheel clearances, brake calipers, etc., you can prevent the moisture from seeping into parts and reduce the risk of damage to parts. A compressed air pump allows you to do this very quickly. And drying is the best choice to ensure that the water is completely not there.
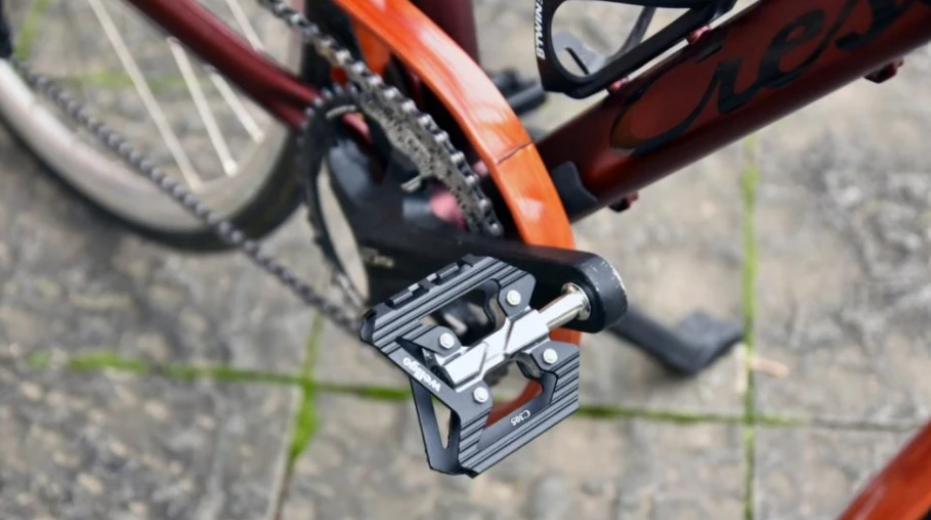
2.11 How do I mount pedals correctly after bike maintenance?
When installing the foot pedal in a bike maintenance, you need to add sufficient grease to the threads and try to install the protective washer to prevent the connection between the crank arm and the foot from being too tight or oxidized. Do not use more than 30-Nm of torque when screwing the foot into the crank arm. In addition, you need to be careful during the disassembly process. Please pay special attention to hand safety to avoid injuries, especially from accidental contact with teeth. Gloves are best worn at work to protect hands.
2.12 How to correctly install the quick release system?
It doesn’t have to be done in a bike maintenance, check your quick release system before each ride. In most cases, it is wrong to start the quick release system by rotating the handle. When installing and removing the quick release system, ensure to follow the manufacturer’s instructions and ensure that the components are correctly aligned and locked. Do not overexert to avoid damaging the system or causing potential safety hazards.
2.13 Are you using the correct chain?
During a bike maintenance, If you need to change the length of the chain, use a professional tool. In addition, the wear of the chain is also a problem to be noted. Early detection and repair of these problems can avoid damage to more accessories, including flywheel and real. It is recommended to check the length of the chain periodically with a chain measuring tool. If you ride more on the road, SUMLON recommends that you check your chains every 3000 km of road. If you often ride in the mountains, you have to consider whether to replace your chains after every 1500 km of cycling.
3.Timeline and Maintenance Schedule
For different parts, many people do not know how often they should do a bike maintenance. In the following, SUMLON gives a timeline for maintenance of different parts.
3.1 Bike maintenance timeline and schedule: Before each ride
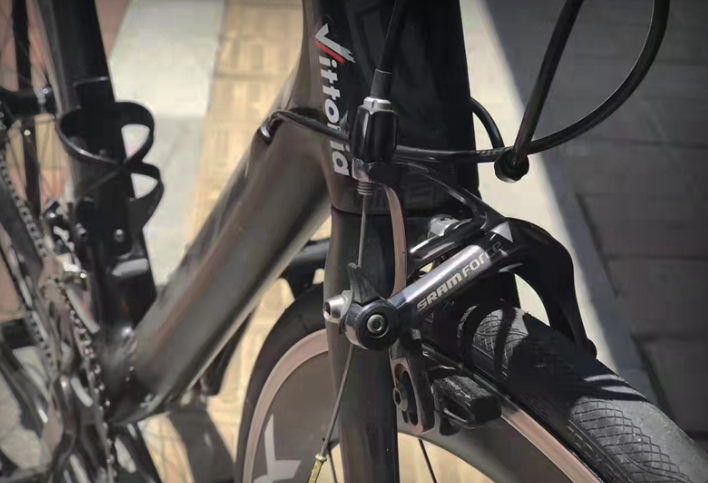
3.1.1 Brake system
Check the stroke and tightness of the brake lever to ensure smoothness, then check the wear condition of the brake shoe and replace it in case of serious wear and then check whether the brake line is loose, broken or worn. Ensure that the brake shoe contacts the hub evenly without looseness. Press the brake handle and check whether the brake effect is good. Confirm that the brake disc is free from distortion or damage. Test the balance of front and rear brakes to ensure stability.


3.1.2 Head tube
Check whether the bolts of front fork and frame are fastened, especially the bolt head and joint. Observe whether the front fork and frame interface are loose or have foreign matters. Shake the front fork slightly to ensure that there is no abnormal looseness or noise at the connection. Check the front fork and frame surface for crack or deformation. If any problems are found, they should be adjusted or repaired in a timely manner to ensure riding safety.
3.1.3 Quick disassembly system
Check whether the quick release shaft and quick release lever are clean, lubricated and free from damage. Ensure that the quick release parts are correctly installed and fastened without looseness. Check the locking status of quick release system to ensure that it is completely locked and free from abnormal sound. Test whether the quick release system is smooth and whether the tire can be quickly removed and installed.
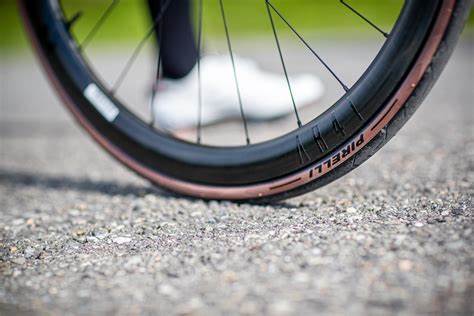
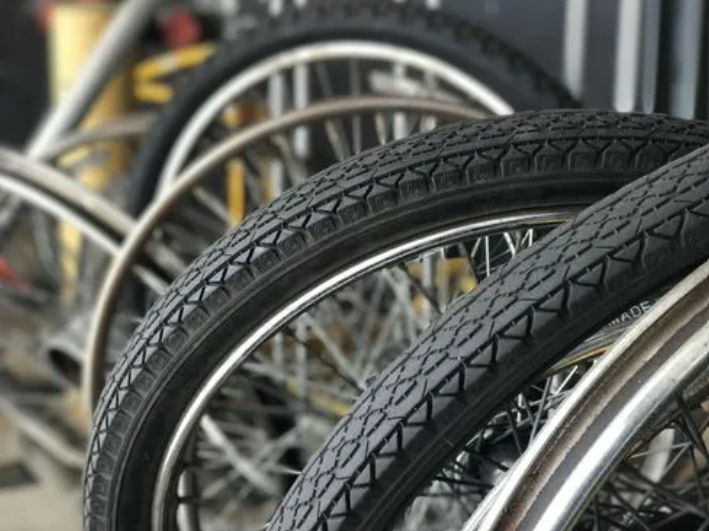
3.1.4 Tire surface
Check the tire surface for burrs, glass and other sharp objects, remove and repair. Check the tire for wear, crack or foreign matter, and replace it if necessary. Observe whether the tire tread is worn evenly. If not, adjust the air pressure or position. Check whether the tire tread has bubbles or debonding, and replace the tire if any. Touch the tire with hand and check for unusual hardness or softness to ensure good grip and handling.
3.1.5 Tire pressure
Check whether the tire pressure is within the range recommended by the manufacturer with tire pressure gauge. If the tire pressure is too low, use the air pump to gradually pressurize it to a proper level. Ensure that the tire valve is in the correct position and fastened.
3.2 Bike maintenance timeline and schedule: Every week
3.2.1 Transmission system
Use cleaning agents and brushes to clean chains, gears and transmission to remove dirt and deposits. Then apply an appropriate amount of lubricating oil on the chain to ensure that each link is fully lubricated. Avoid excessive lubrication so as not to absorb more dust and impurities. Regular cleaning and lubrication reduces wear, improves transmission efficiency, prolongs component life, and ensures a comfortable, stable riding experience.
3.3 Bike maintenance timeline and schedule: Every Month
3.3.1 Cleaning of complete vehicle
Wash the frame, hub and brake system with clean water to remove dust and dirt. Then, use mild detergent and brush to clean the frame, wheel rim, chain and other parts, and avoid electronic parts and bearings. Completely wash and dry the vehicle to ensure no residual cleaning agent. Finally, apply an appropriate amount of lubricating oil on chains, gears and other moving parts to ensure good operation and extend the service life. In addition to aesthetics, vehicle cleaning can extend the life of bicycles and improve ride comfort.


3.3.2 Transmission system
Completely clean the chains, gears and transmission with cleaning agent and brush to remove dirt. Allow to dry after washing and apply appropriate amount of lubricating oil on the chain. Observe the chain tension, rust, gear wear, abnormal sound or sense of pause. If any abnormality is found, consider replacing the chain or gear to ensure the normal operation of the transmission system.
3.3.3 All screws
It is essential that all screws are checked regularly. Use a torque wrench to check the tightness of the screws to ensure that they are securely attached. Pay special attention to whether the screw head is loose or damaged. Check the screws on the frame, brake, transmission and wheels. If loose or missing, tighten or replace screws immediately. Regular inspection can avoid screw looseness or falling off and ensure riding safety.

3.3.4 Brake system
Check the stroke and tightness of the brake handle to ensure smooth operation. Check the wear condition of the brake shoes. If there is serious wear or foreign matter, replace it in time. Check whether the brake line is loose, broken or worn, especially at the oil pipe. Ensure that the brake shoe contacts the hub evenly without looseness. Press the brake handle and check whether the brake effect is good and whether there is abnormal sound. Finally, check whether the brake disc is deformed or damaged. In case of any abnormality, immediately adjust or replace the components to ensure the reliability and safety of the brake system.
3.3.5 Check the abrasion degree of tire
Observe the tire surface. If there is crack, wear, puncture or bubble, it indicates that the tire has been aged or damaged and needs to be replaced. Check the tread wear indicator line. If it has been polished, it indicates that the tire is seriously worn and needs to be replaced. Touch the tire with hands, if the feeling is uneven or hardened, it may be an aging sign and needs to be replaced. If the tire continues to leak, it indicates that the tire may have internal structure damage and needs to be replaced. Finally, frequent tyre failures during cycling, such as a flat or leaking tyre, also indicate the need for replacement.
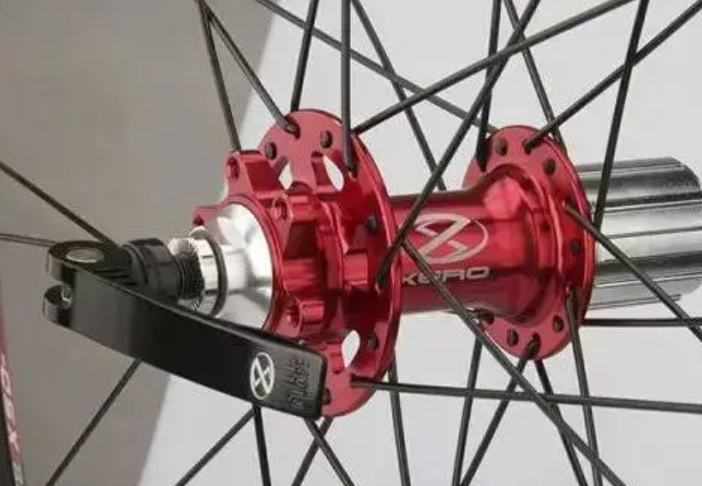
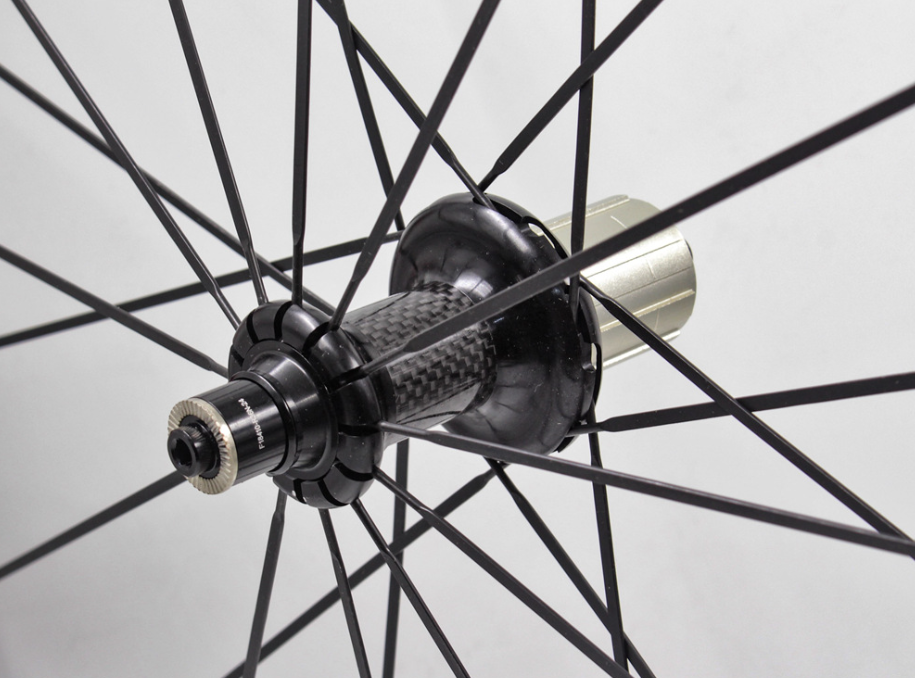
3.3.6 Check the front and rear hubs
First, gently rotate the wheel and observe whether it rotates smoothly. If there is abnormal friction or resistance, it may be the signal that the hub needs to be adjusted or repaired. Touch the hub with your hand and feel for abnormal heat, overheating may be a sign of bearing failure. Check whether the hub has abnormal sound, such as creaking or abnormal sound. It may be that the bearing needs to be cleaned or replaced. Finally, check whether the hub is perpendicular to the ground. If there is any deviation, the riding may be unstable, and the hub needs to be adjusted.
3.4 Bike maintenance timeline and schedule: Every three months
3.4.1 Check the frame surface
Whether the frame is deformed can be preliminarily judged by observing the painted water surface of the bicycle frame. First, carefully check the frame surface for cracks, dents or blisters. Gently touch the surface of the frame to feel whether it is flat. If uneven or abnormal dents are found, it may indicate that the frame is deformed. Move around the frame with your eyes and observe for signs of distortion or asymmetry. In addition, use a ruler or measuring tools to check whether the dimensions of each key part of the frame are symmetrical and consistent. If any of the above abnormalities is found, the frame may be collided or distorted, which shall be repaired or replaced in time.
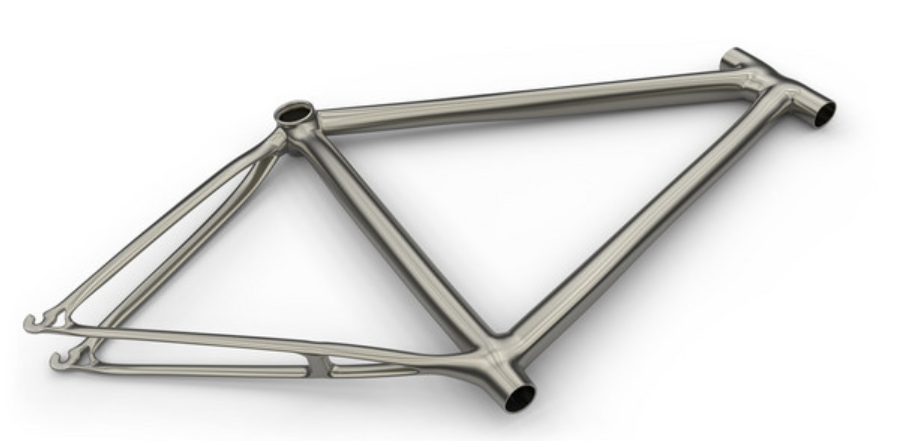
3.4.2 Check each welding position
Visually inspect welds for cracks, breaks, or unusual depressions. Gently touch the weld to see if it is flat, and protrusions or depressions may indicate poor weld quality. Then, tap the welding part with fingers to hear whether the sound is even and clear. The abnormal sound may indicate that there is a problem at the welding part. Special attention shall be paid to the key joints of the frame, such as head pipe, seat pipe and scaffold. In addition, check that the welds are uniform and free from voids or blisters to ensure good welding quality.
3.5 Bike maintenance timeline and schdule: Every six months
3.5.1 Headset
During cycling, the headset needs to be checked regularly and in particular replacement should be considered if. When you feel that the steering is not smooth or loose, it still exists even after the screws are tightened. An abnormal sound such as creaking or rubbing is heard. Obvious wear, crack or deformation of headset parts observed. Unstable steering or increased friction during ride. Frequent cycling on wet or muddy roads may result in rust or damage to headset components. When the headset has the above problems, there should be timely replacement to ensure riding safety and comfort.
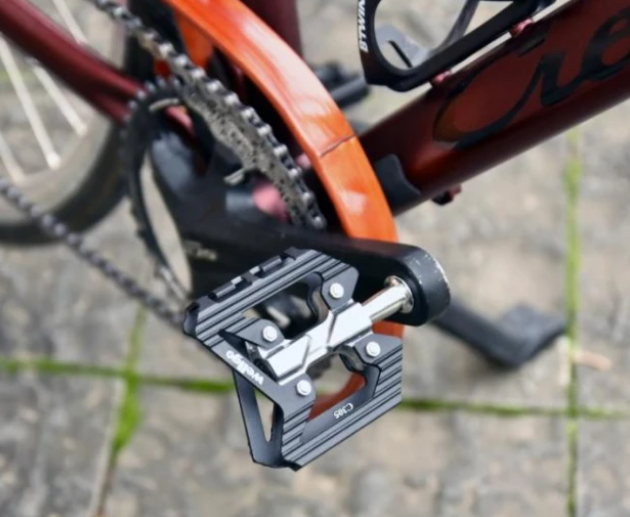
3.5.2 Pedals
Consider replacing pedestals when they are worn, such as obvious wear or cracking on the plastic surface. Pedestal bearing loosens or gets stuck, affecting ride comfort and efficiency. PEDAL THREADS WORN OR DEFORMED TO SECURE TO CRANK. Frequent cycling on wet or muddy surfaces may result in foot rust or bearing damage. The modeling of the pedestals does not meet the needs of individual cyclists, such as platform pedestals that require a larger area of support.
3.5.3 Bottom brackets
Watch out for wear on the bottom bracket (BB) while cycling. The timing to consider replacing BB includes feeling an abnormal sound or a feeling of looseness in the BB area, even though it is still present after tightening. The friction in BB area increases or the resistance increases when stepping. Oil stains, rust, cracks or deformations were observed in the BB area. BB bearing loosens or gets stuck, affecting ride efficiency and comfort. Frequent cycling or frequent cycling on wet, muddy surfaces may result in damage to BB components. The frame generates abnormal sound or vibration, which may be related to BB.
3.6 Bike maintenance timeline and schedule: Every year
Every year you have to disassemble your bike completely for overhaul. Replace all bearings if possible. If you ride more than 8000 kilometers per year, you must replace all the brake lines and the wire harnesses in the derailleur system. Also, if you’re a regular cyclist in the rain or you’re a mountain bike rider, you need to check your bike more often and thoroughly. Before every important journey, professional inspection and adjustment is a clear choice and will make the journey more pleasant.
By the way, SUMLON has been manufacturing bicycle parts for over 15 years. Contact us if you are looking for a bike parts factory or a one-stop wholesaler. Peace